Redes Sociales

lunes, 27 de febrero de 2017

Discovering Tofino Xenon

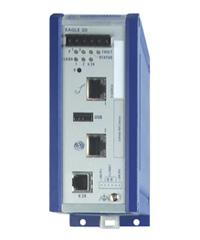
Tofino, apart from a lovely area in the west coast of Canada is a security company that develop products like Tofino Eagle or Tofino Xenon.

The first one is the name of a series of industrial specific routers and the second is an industrial firewall. I was lucky enough to get in contact with a Tofino Xenon and could test its characteristics. The purpose of this post is to capture my experiences with it.

Tofino Xenon

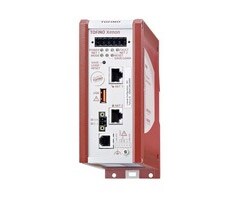
Tofino Xenon is an industrial firewall with state inspection (Stateful firewall - SPI) and Deep Packet Inspection (DPI), that allows the user to filter both Modbus and Ethernet-IP industrial traffic.

Among its characteristics, we should mention that it has two Ethernet 10/100Mbps port and that it works in a transparent on the link layer OSI 2 level, as if it was a bridge device. On the other hand it has the capability to be mounted in a rack through a DIN rail.

The installation is very simple. The manufacturer recommends to install it "just in front of" the PLC or field device that we need to protect and "install a Tofino for each device we need to protect". Taking into account the price of a Tofino Xenon, that's a huge economic effort and not all companies can afford to follow these instructions...

We tested a Tofino in a testbed at the CICLAB laboratory in the University of Leon (in Spain). We connected it, on one Ethernet port to a typical 4 port non-industrial switch and on the other Ethernet port to a Schneider-Electric M340 PLC.

Our objective was to understand how the Tofino Xenon worked. We were not prepared to not even being able to connect to it. Our first difficulty was to discover the MAC address of the Tofino Xenon. We knew that the manufacturer provided a discovery application (Tofino Configurator) that allows to operate with the Tofino Xenon. However we wanted to test on our own, mainly because Tofino Configurator only works for Windows systems... After a few minutes we realized that Tofino Configurator is actually a Java development which is been later compiled into a .exe file.

So, we connected to the Tofino Xenon as explained and tried to discover it on our own. The device itself comes with a sticker which stated the "Tofino ID”. which appeared to be a MAC address. However, the more we tried to "NetDiscover" that mac address (or any other), we didn't find any network device connected to the network:

Eventually we got to find some documentation mentioning that the Tofino ID was actually the MAC address, but this device kept invisble for us. Finally a youtube video ( TV201: Tofino Orientation - https://www.youtube.com/watch?v=gigtan466rA), shed some light into our situation. We then realized that device (as it's stated in the documentation) works at Level 2 OSI, and therefore it never adquires any IP address.

We then realized that Tofino Configurator has a peculiar way of discovering Tofinos:

  1. Tofino Configurator only works if there are two devices (or networks) connected to the Tofino, one to each Ethernet Port.
  2. With this configurator, it sends a UDP packet simulating to be a device connected to one of the ethernet ports, and that packet is sent to another device which is in the network connected to the other Ethernet port of the Tofino Device. This UDP packet will be sent to the 6689/UDP port of the "destination device".

    Tofino Xenon discovery performed with Tofino Configurator

  3. Tofino Xenon detects this packet and returns a new UDP packet to the originator, apparently from (and therefore faking) the address of the UDP destinee. However is actually Tofino Xenon who is replying. This UDP request never arrives to the destination.
  4. When this UDP packet is returned, a TCP conversation starts between our computer and the the Tofino Xenon.

The following is a Wireshark screenshot of the whole process traffic:

As you can see from our IP address (10.10.13.136) a UDP packet is sent (packet 24) to a device which is located on the other network (10.10.13.200). This IP address belongs to a computer connected directly to the Tofino on the other Ethernet port.

The UDP packet is sent against port 6689 of the destinee. As there's nothing listening on port 6689 of the destination computer, this returns an error ICMP reply (packet 25) -in black-, but, at the same time, the originator receives as well a UDP packet (packet 26), apparently from the same destination IP and from the port 65002. Packet 26 is actually sent by the Tofino Xenon, when it detects a the previous UDP packet which travel between its ethernet ports. This UDP packet is clearly parsed by the tofino Xenon, which clearly shows, it's a stateful firewall.

Tofino Configurator sends next, from the origin IP (10.30.13.136), a second -slighly longer- UDP packet (packet 30), which is never replied by the Tofino Xenon.

Finally Tofino configurator starts a TCP conversation (packets 36 on) where the Tofino Xenon configuration information is interchanged.

Information interchanged next through a TCP (encrypted) connection

Our first objective was trying to understand the UDP "handshake" sent between Tofino configuration and Tofino Xenon, but we were not able to understand the UDP payload. It sends a 68 byte payload. From thos 68 bytes, bytes 21 to 36 (16 bytes) were always the same, in all discoveries we tried. It could be any license key from the Tofino Xenon.

The rest of the bytes are clearly encoded or even encrypted data (no bytes 00 or FF were found):

We tried to write our own script in order to be able to connect and configure the Tofino Xenon. We used python and Scapy to do it:

Even when we followed the steps previously mentioned, the Tofino Xenon did not reply to the UDP packet on port 6689. We eventually tried to connect a second Tofino Configurator software to try to work in two computers at the same time. And then we realized that we could connect to Tofino Xenon from towo machines at the same time.

Somehow, Tofino Xenon maintains a connection status and the MAC address from the "owner" client of the firewall. It seem to store any kind of state table that stores which MAC address is the "Master", and only this Master has the capabilities of access and modification over the Tofino Xenon configuration.

So to confirm this hypotheses, we resetted the Tofino Xenon. Again, only the first "client" was allowed to configure the Tofino Xenon. It seems that once a "master" takes control of the Tofino, no other device is allowed to even "discover" it (UDP packets to port 6689, do not work any more).

DoS

Another test we performed was to send it a hugh amount of UDP packets to port 6689. We detected that, if Tofino has already been discovered, Tofino simply discarded and relied UDP packets to port 6689. But if Tofino had NOT been already discovered and a 6689/UDP packet flooding was performed, a Denial of Service occurred, as no other IP could discover Tofino, because it was working on parsing all malicious UDP packets.

"Pickpocketing" Tofino

Then we deciedd to try to "pickpocket” Tofino Xenon to a legitimate Tofino Configurator who had legitimely discovered it.

We tried hard and harder but we were not able to accomplish this task. Once a UDP to port 6689 passes through Tofino, the device stops replying to any request not coming from the owner/master who has discovered it. Only when we modified/faked our attacking MAC address to be the same of the legitme master could we receive any reply from Tofino.

Next test was to try to understand the “protocol” used between the Tofino Configurator and the Tofino Xenon. We obtained a pcap file with the traffic interchaneg between both of them. We found that:

  • Tofino Xenon comes with an embedded OpenSSH server. it's banner says it's a OpenSSH 6.4 (from 2014)
  • Tofino Configurator uses a library named Ganymed to connect to Tofino Xenon. This library was implemented in 2006.

All the configurator initialization process, the Tofino rules which are sent to the device, the reset process and many other functions offered by Tofino Configurator are performed through encrypted commands sent via SSH.

A second script was implemented with Scapy that emulated that encrypted communication, from a previously obtained pcap file. However, although the connection was established, logically, the encryption key need to be different to the one used in the captured pcap, so we could not continue on this path.

This way, after a promising initial connection establishment, the Tofino cutted of the communication once the key interchanged process was not able to finish properly.

After a number of further tests we realized that the encryption key negotiation was RSA-SSH. We tried to modify the encryption algorithm for this negotiation. As it can be seen in the following capture, the negotiated protocols go in plain text and we could modify them, removing all but "None":

Eventually we discovered that the Tofino Configurator library allows the "None" cyphering algorithm, however Tofino Xenon does not. At this point, we decided to give up in our attempts to compromise Tofino Xenon.

Summary

Tofino Xenon is a secure Industrial Firewall. It includes a number of security features (it is only discovered at level 2 OSI, all communication is performed via SSH, and therefore encrypted, etc). However I wouldn't say it's unbreakable. From our point view, it's been only the lack of time that has stopped us from compromising it. It's not easy, but it does not seem impossible.

Several tests could not be performed:

  • Continue working on the encryption and encryption key negotiation process
  • Decompiling Tofino Configurator in order to understand how the Configurator work

However one possible vulnerability was found, as the device stops responding when it has not been discovered and it's flooded with UDP packet to port 6689. This cannot be considered a vulnerability, as the first step an operator does when installing the Tofino Xenon. And once a PC connects to the Tofino, it cannot be used by other "client" unless it's reset.

Given the price of the device, the manufacturers should have put stronger efforts on securing point like:

  • Not using Java for Tofino Configurator Development
  • Adding more protocol that can be inspected by the firewall
  • Avoid flooding attacks

Surely inside Tofino there's a Linux OS, or maybe a VxWorks OS. But surely it implements a iptables firewall inside it.

From our point of view, it would be much cheaper to implement a industrial firewall using a computer with a well-tested set of iptables rules.

P.S: These tests were performed by the members of the CICLAB Group at the University of León (Juanma, Jacinto, Borja and me).

miércoles, 22 de febrero de 2017

Resource exhaustion vulnerability on Schneider-Electric M340 PLC

Introduction

Past May, while working at the CICLAB laboratory of the University of Leon (Spain), I came across with a vulnerability on the PLC (Programmable Logic Controller) I was working with. For a research paper, which is currently under review, I had to deal with the configuration protocols used by the different PLCs I had in my testbed. The testbed consists of a number of PLCs from different vendors, among them Schneider-Electric.

Schneider-Electric PLCs configuration protocol is an evolution of the well-known modbus protocol, but using only the 0x5A Function Code. This protocol (or subprotocol), named internally "UMAS", has not been publicly specified, and therefore it had to be reverse-engineered.

After decoding this "UMAS" protocol (which I will explain in a future entry of this blog), I tried to send some invalid traffic to test the robustness of the PLCs.

From the Schneider Family of PLCs I had two different models in my testbed, a M580 PLC and a M340 PLC. After several tries, I was not able to compromise the Schneider-Electric M580 PLC, however when tried to send specially crafted UMAS packets to the M340 PLC, I found it stopped replying to ping commands.

This behaviour was tested using three different firmware versions. The M340 PLC seemed vulnerable, even when working with the latest firmware version (V2.70 at the moment).

Schneider Electric was contacted. I sent them an explanation of the problem together with a "pcap" file that showed the problem. Very quickly they let me know they had done their own tests and that it was a real vulnerability. It was finally published as the security notification SEVD-2017-048-02. The ICS-CERT has not released the public advisory yet, but they're on the way.

I must say they have been very very professional.

The Schneider-Electric M340 PLC

Explanation of the vulnerability

As mentioned earlier, this vulnerabilities is based on the modification of a series of legitimate "UMAS" packets sent in a specific order. "UMAS" is a configuration protocol that allows the software clients (Unity Pro and Vijeo Citect among others) to connect, configure and monitor Schneider-Electric PLCs. More than 20 different subfunction codes have been determined. These function codes allow the client to perform different tasks (Check keepalive, start/stop, upload/download strategies, read/write memory, etc).

One of these "subfunction codes" allow the client to "read" from the PLCs memory asking for a number of bytes to be read, starting from an offset of a "Memory block" (specified by a 16 bit number).

These memory blocks store different types of information (unlocated variables, system words, function blocks, etc). Every memory block has a different size (or top offset), depending on the data stored (sometimes it's 0x5B00, sometimes 0x3F00, sometimes 0xF500...). When trying to read memory over the "top offset" of a memory block, the PLC got locked. This happened with different "memory blocks", always that you sent a UMAS_read_memory request reading over the top offset of the block.

That's what, in other words Schneider-Electric explain with the following sentence:

The software does not properly restrict the size or amount of resources that are requested 
or influenced by an actor, which can be used to consume more resources than intended. 

After sending this series of packets, the PLC got freezed and only could be recovered by approaching physically to the device and resetting it manually.

The following image show a wireshark capture at the moment where this packet (#133) is sent. Before the packet is sent the PLC (IP 10.1.0.102) replies to the different requests done by the client (10.8.0.101). It can be seen as well that a few seconds later some ping commands are sent and the PLC do not reply them:

Wireshark capture of the moment of the attack

The vulnerable UMAS packet is shown shadowed, but it can be seen that it requests the offset 0xF503 (while the top offset is 0xF500.

The following image shows the python script written for testing purposes. In the screen of the right the script is launched, in the screen of the right a ping command is running and suddenly it stops showing ping connection (when the exploit packet is finally sent).

Scripts used for the test

Current Situation

Schneider-Electric bundled a number of fixes in a new firmware version (V2.90) which was released on December 21st. However, 2 months after the public release, very few from the currently available Schneider-Electric M340 PLCs are currently protected.

The Schneider-Electric public disclosure of this vulnerability was published a few days ago.

A simple search in shodan for on of the affected devices (looking for "BMX P34 2020") show that more than 700 devices (of this type) are currently accessible to internet and have not been upgraded to the firmware version V2.8 or V2.9.

Shodan capture showing more than 700 vulnerable devices

This means that more than 700 potentially critical devices could be sent offline remotely in a question of seconds. I have an exploit script for metasploit ready, but clearly it will not be publicly released for a few months (or years!).

Acknowledges

The discovery of this vulnerability has been possible by the funding of INCIBE and thanks to the support of the colleagues of the CICLAB Laboratory at the University of León (Jacinto, Juanma and Borja) and the rest of the guys of the IAF.

lunes, 30 de mayo de 2016

Cifrado (y III)

Cifrando correos electrónicos

Mucha información muy confidencial se envía a diario usando el correo electrónico. Si esto se realiza sin ningún tipo de cifrado cualquier podría leer lo que escribimos y mandamos en ese correo en cualquiera de los puntos intermedios por los que pasa el mensaje (recordemos que cualquier comunicación realizada a través de internet pasa por los servidores del ISP que tenemos contratado, los servidores del servicio que nos dan el servicio (por ejemplo los de google si usamos gmail) y los servidores finales de la empresa receptora. En cualquiera de esos puntos podría haber alguien leyendo los contenidos de nuestro mensaje.

Desde Microsoft Outlook 2007 es posible cifrar los mensajes de forma individual o en su conjunto (todos los que mandemos). Para ello, es necesario disponer de un certificado personal, como los que expide la Fabrica Nacional de Moneda y Timbre o entidades certificadoras como VeriSign. Pero de una forma más barata, podemos usar tambien el DNI Electrónico, aunque para mandar correos firmados por el DNI electrónico es necesario:

  1. Que nuestro DNI tenga los certificados en vigor (si no estamos seguros lo mas probable es que la respuesta sea que no, por lo que habrá que acercarse por una comisaria de policia para renovarlos).
  2. Conocer la contraseña (privada) de esos certificados.
  3. Un lector de smartcards y los drivers correctamente instalados.
  4. Un programa de correo compatible con S/MIME (practicamente todos hoy en día. MS Outook nos vale).
  5. Modificar un entrada del registro de Windows.

Voy a suponer que los cuatro primeros puntos ya los tenemos conseguidos, por lo que me centraré en el punto 5 y continuaré. Para poder mandar correos electrónicos firmados digitalmente por el DNI electrónico con Outlook es necesario abrir el Editor de Registro y modificar una entrada del registro:

  1. Menu de inicio --> Ejecutar --> regedit.exe
  2. En la parte izquierda de la ventana hacer clic en HKEY_CURRENT_USER.
  3. Dentro de HKEY_CURRENT_USER, aun en la parte izquierda hacer clic en Software, luego en en Microsoft, y luego en Office.
  4. Dependiendo de la version que tengamos deberemos entrar en 12.0, 14.0 o 15.0 (version 2007, 2010 y 2013 de Office respectivamente).
  5. Por ultimo y aun en la parte izquierda ir a Outlook y luego a Security.
  6. En este momento hay que mirar la parte derecha y buscar una entrada que se llama "SupressNameCheck". Si existe este debe tener como valor "1". Si no es asi, hacer clic dos veces sobre ese valor y modificar el "0" por el "1". Si no existe, hacer click con el boton derecho del raton sobre la parte derecho de Editor de Registro y hacer click en "Agregar". Aparece una nueva ventana de dialogo que nos permitirá crea una nueva entrada con el nombre "SupressNameCheck" y con el valor "1".
  7. Una vez hecho esto, podemos cerrar el Editor de Registro y reiniciar el Outlook.

Una vez reiniciado Outlook, y con el DNI electrónico conectado y reconocido (lucecita verde del lector), para cifrar un mensaje suelto, en el mensaje, haremos clic en Opciones --> Mas opciones --> Configuración de seguridad --> Cifrar el contenido del mensaje y de los datos adjuntos, y le daremos al botón "cambiar configuración" y en la nueva ventana, el boton "Elegir" nos permitirá seleccionar el certificado del DNI electrónico.

Para que todos nuestros correos electrónicos se envien cifrados, es necesario crear y aplicar una nueva "configuracion de seguridad". Para ello es necesario ir a Archivo --> Opciones --> Centro de Confianza -->Configuracion del centro de confianza --> Seguridad del correo electrónico --> Configuracion --> Ponerle un nombre a la nueva configuración de seguridad --> Escoger el certificado de cifrado --> Aceptar --> Escoger esta nueva configuración como configuracion predeterminada.


Cifrado de correos con GNUPG

GNUPG es una herramienta de cifrado y firmas digitales, que viene a ser un reemplazo del PGP pero con la principal diferencia que es software libre. Dispone de varios plugins para los principales clientes de correo. GNUPG para windows se puede descargar de https://gpg4win.org/download.html

GNUPG es un paquete de utilidades de cifrado que incluye:

  • GnuPG, el motor de cifrado, la herramienta que se encarga de todo el proceso.
  • Kleopatra: la utilidad para gestionar certificados desde una interfaz gráfica cómodamente.
  • GpgOL: la extensión de Outlook para cifrar y firmar correos de forma sencilla.
  • GpgEx: la extensión de Explorer para cifrar o descifrar con el botón derecho.
  • Claws Mail: un cliente de correo electrónico.

Por desgracia GpgOL solo funcionaba hasta Outlook 2003. Ahora es posible contar con una extensión más: Outlook Privacy Plugin, que amplía el soporte para las versiones más recientes: 2010 y 2013, tanto en 32bits como en 64bits. Eso sí, siempre en Windows Vista, 7 ó 2008, ya que requiere del Framework 4.5 de .NET y este no se encuentra disponible en el ya obsoleto y decadente Windows XP.

La puesta en marcha es un poco engorrosa, una vez configurado Gpg4win y el ya comentado framework 4.5 de .NET, se ha de instalar también Visual Studio 2010 Tools for Office Runtime de Microsoft y por último la última versión disponible del plugin, que está en continuo desarrollo y fase BETA (o dicho de otra forma, mejor que nada y prepárate para algún que otro casque)

En https://www.isecauditors.com/sites/default/files/files/iseclab2.pdf podemos encontrar un manual muy completo para la configuración y uso de GNUPG para el cifrado de mensajes con Microsoft Outlook y otras herramientas de correo.


Cifrado en Gmail

Aunque el acceso a gmail se realiza siempre utilizando https y por tanto nadie puede interactuar en nuestra lectura de los correos. A la hora del envío el correo electrónico circula por los diferentes servidores de salto "en claro".

Para poder cifrar correos de gmail podemos usar diferentes técnicas:

  • Si usamos Google Chrome, podemos instalar los plugins "Mymail-Crypt for Gmail" (https://chrome.google.com/webstore/detail/mymail-crypt-for-gmail/jcaobjhdnlpmopmjhijplpjhlplfkhba?utm_source=chrome-ntp-icon), "Secure Gmail by Streak"
  • En mozilla Firefox tenemos el complemento "Gmail S/MIME"

Recepción de correos cifrados

Antes de empezar a enviar mensajes de correo electrónico, cifrados, tú, como emisor y los receptores de tu correos debeis obligatoriamente intercambiar vuestras claves públicas. También debeis confirmar la validez de cualquier clave que acepteis confirmando que en realidad pertenece al supuesto remitente.

En Thunderbird con Enigmail esto se hará en la opción OpenPGP --> Adjuntar Mi Clave Pública cuando estemos escribiendo un correo electrónico.

Cuando recibamos un correo cifrado en Thunderbird nos aparecerá algo asi:

Para poder ver el mensaje deberemos, como indica el mensaje, hacer clic en el boton "Descifrar" de la parte superior de Thunderbird. En ese momento se importará automaticamente la clave pública del emisor, se descifrará usando su clave pública y a continuación se nos pedirá la contraseña para poder descifrarlo usando nuestra clave privada.

En ese momento, tendremos el mensaje en claro.


Firma electrónica

Una firma digital se consigue calculando un valor hash, que es un valor único que cambia cada vez que se modifica lo mas minimo un documento (un espacio en blanco mas o menos, implica un valor hash completamente diferente). Ese valor hash se adjunta al final del documento y se cifra para que nadie pueda leerlo más que el receptor. De esta manera que el receptor del mensaje o documento, lo primero que hace es descifrar el hash, calcular el hash del mensaje o documento y comprobar si son iguales. Si son diferentes, advertirá al usuario de que podría haber habido una modificación del mensaje durante el tránsito.

Firma de correos electrónicos con MS Outlook

La firma electrónico de correos electrónicos con MS Outlook es igual al cifrado. Podemos utilizar un certificado de Ceres o de una CA como Symantec, pero lo mas fácil y barato tal vez sea el firmado con el DNI electrónico. La opción de firmado de un mensaje se encuentra justo debajo de la de cifrado y se llama "Agregar firma digital a este mensaje". De nuevo, al igual que antes, es necesario ir al botón "Cambiar configuración" y escoger un certificado para la firma de mensajes (Usaremos el del DNI como indicamos antes).


Firma y cifrado de correos en Thunderbird con GNUPG y Enigmail

Enigmail es una extension de Thunderbird Enigmail que debe instalarse en Thunderbird yendo a Herramientas --> Complementos. Al reiniciar Thunderbird y encontraremos una nueva opción en el menú superior llamada OpenPGP. Al seleccionar dentro de ella "Administración de claves" podremos crear un nuevo par de clave (publica y privada), yendo a Generar > "Nuevo par de claves".

Durante el proceso se nos pedirá: La cuenta o ID de usuario, la contraseña (diferente a la clave privada), que sirve para proteger tu clave privada contra un uso fraudulento; si alguien consigue robar tu clave privada, aún necesitará conocer la contraseña asociada para poder utilizarla. También se nos pedirá el tiempo de expiración de la clave, es decir, el tiempo durante el cual la clave que se genere será válido.

Finalmente pulsaremos en generar clave y pasados unos minutos (dependiendo de la potencia del PC) ya tendremos un par de claves publico privado que podremos ver en el Administrador de Claves de Open PGP.

Cuando haya acabado, se te preguntará si quieres generar un certificado de revocación, el cual necesitarás si pierdes tu clave privada o te la roban. Haz clic en Sí y guarda el certificado en alguna carpeta que no sea de acceso público. También puedes guardarla en un pen-drive.

Se puede usar la nueva clave para firmar y cifrar correos. Para ello, abrimos el diálogo de configuración de las cuentas y en la sección Seguridad OpenPGP seleccionaremos "Activar el soporte OpenGPG (Enigmail) para esta identidad".

Para no tener que incluir la clave pública en todos los mensajes que mandemos, podemos subirla a un servidor de claves. Estos servidores son de acceso libre, para que cualquier pueda conocer tu clave publica. Para publicar tu clave en uno de estos servidores, no tienes más que hacer clic derecho en ella en la ventana de administración de claves de Enigmail y seleccionar la opción Subir claves públicas al servidor de claves. En la lista de servidores que aparece, selecciona uno y pulsa el botón Aceptar.

Con la opción "Usar la dirección de correo de esta identidad para identificar la clave OpenPGP" o "Usar un ID de clave OpenPGP específico" se puede subir una clave PGP a Thunderbird.

A continuacion hay que activar el firmado y/o cifrado de los mensajes por defecto. Si no se activa, siempre se podrá hacerlo mientras estemos redactando un correo a través del menú OpenPGP o los botones OpenPGP y S/MIME de la ventana de redacción, que se muestran por defecto tras instalar Enigmail.

Para firmar un mensaje necesitamos la clave pública del usuario al que queremos enviar el mensaje cifrado.

Subir la clave pública a un servidor de claves

El usuario al que queramos enviar un correo cifrado deberá realizar el mismo proceso (o el equivalente con su gestor de claves GPG) para subir su clave pública a un servidor de su elección, cuya dirección te deberá proporcionar. En la ventana del administrador de claves de OpenPGP, seleccionamos en el menú Servidor de claves > Buscar claves. En el diálogo que aparece, introducimos la dirección del servidor de claves que nos haya proporcionado el otro usuario y el nombre o identidad con que registró su clave. Pulsamos en Aceptar y aparecerá una ventana con las claves encontradas en el servidor que coinciden con tu criterio de búsqueda. Seleccionamos la que queramos importar y pulsamos Aceptar, tras lo cual podremos ver la clave pública del contacto en la lista de claves disponibles.

Firmar y/o cifrar mensajes

Para firmar nuestros mensaje, seleccionamos en el menú superior OpenPGP --> Firmar mensaje, o pulsamos el botón OpenPGP de la barra de herramientas. Al enviar el mensaje se nos pedirá la contraseña de nuestra clave privada, si la protegismos de esta manera, y se generará un código cifrado a partir del contenido del mensaje y permitirá al destinatario verificar que el cuerpo del mensaje no ha sido alterado en su trayecto.

Cierre

Con esto cerramos los tres articulos relacionados con el cifrado en todas sus vertientes. Hemos hablado de cifrado de dispositivos, de discos, de moviles, de comunicaciones... y en esta ultima entrega de correos electrónicos.

martes, 17 de mayo de 2016

Cifrado (II)

Continuamos con la serie sobre cifrado, hablando en este caso del cifrado en dispositivos moviles.

Dispositivos móviles

Hoy en día pocos son los que viajan con un portátil y es en las tablets y móviles donde almacenamos la información sensible que queremos presentar a clientes, proveedores, etc. Es también imperativo el cifrado de estos dispositivos móviles para evitar fugas de información de todo tipo.

En las ultimas versiones los sistemas operativos de las principales tecnologías móviles vienen con herramientas de cifrado completo del dispositivo.

IOS

Apple cifra sus dispositivos iPhone y iPad desde iOS5. El cifrado se realiza utilizando el algoritmo AES de 256 bits. Como en anteriores sistemas, cada fichero tiene una clave única y aleatoria de cifrado. Esta clave se almacena en un ficherito de metadatos propio del fichero cifrado que es cifrado con una clave propia del sistema de ficheros (clave A) y con una segunda clave que es una combinación del código de bloqueo del usuario y de una segunda clave única a cada iPhone y iPad (clave B).

Esta segunda clave de cifrado (la clave B), aparte de ser única para cada dispositivo, no es almacenadas por Apple en ningún momento. De hecho estas claves se encuentran integradas en los circuitos integrados del propio dispositivo. En concreto en la memoria Flash del dispositivo.

Cuando el dispositivo se apaga, la copia de esta clave que se mantenía en memoria es eliminada y por tanto un atacante tendría que comprobar todas las combinaciones (2 elevado a 256) para descubrir la clave de cifrado (clave B) del dispositivo.

Al habilitar el código de bloqueo, se habilita también el cifrado del iPad. De esta manera, aunque un ladrón/atacante conecte el dispositivo a una computadora no podrá leer la información y en caso de que lo encienda pedirá una clave de bloqueo que bloqueará el dispositivo en caso de un numero excesivo de intentos.

La forma de activar el cifrado en dispositivos iOS es la siguiente:

  1. Ir a Ajustes
  2. General
  3. Código de Bloqueo
  4. Hacer tap en "Turn Passcode On"

Al habilitar el código de bloqueo, se habilita también el cifrado del iPad.

Los dispositivos iOS mantienen una copia de la clave de cifrado (clave B) en memoria flash (si no, no habría forma de recuperar los datos cuando se encendiera el dispositivo). Dado que la clave almacenada en la memoria Flash y la clave del sistema de ficheros (clave A) son únicas al dispositivo y no se pueden cambiar, en el fondo, la seguridad del dispositivo depende del código de bloqueo. Por defecto los usuarios suelen poner un código numérico de 4 dígitos pero este código puede ser alfanumérico y del numero de caracteres que se desee.

Android

El cifrado de disco en Android se incorporó en la versión Honeycomb (3.0) con el nombre de FDE (Full Disk Encryption o cifrado de disco completo). Sin embargo, Android no cifra el disco completo, solo lo hace con las particiones de usuario. Además sólo puede cifrar el almacenamiento interno, y solo desde Android 4.4 puede cifrar unidades SD. El cifrado utiliza el algoritmo AES de 128 bits.

Hasta Android 5.0 la contraseña la introducía el usuario, y el cifrado se basaba únicamente en esa contraseña. Además, no había otra opción y era responsabilidad del usuario no perderla ni olvidarla. En caso contrario se perdia toda la información del dispositivo. Desde Android 4.4 la clave de usuario es cifrada por una clave interna única a cada kernel y es con ésta clave con la que se cifran los archivos. Al final, los datos acaban siendo descifrados con la clave de usuario. De ahí la importancia de usar claves complejas.

La diferencia entre ambos métodos es que con el primero se podía hacer una copia de los contenidos del dispositivo a un PC e intentar una fuerza bruta usando ADB. Esto, desde Android 4.4, no es posible.

Para cifrar el dispositivo Android deberemos acceder a Ajustes --> Configuración --> Seguridad --> Cifrado

El proceso de cifrado puede llegar a durar una hora, por lo que es recomendable dejar el dispositivo conectado a la red eléctrica.


Cifrado de comunicaciones

La información sensible no se encuentra solo en la unidades de nuestros equipos y dispositivos. En el momento de enviar documentos a nuestros amigos y colaboradores, estamos dejando que información potencialmente sensible circule por un cable donde cualquier podría estar escuchando nuestra conversación y la información sensible enviada (O ni eso, en comunicaciones Wifi, la informacion viaha por las ondas, accesible a todo el mundo). Por esta razón es muy importante que todas las conversaciones de todo tipo (navegación web, correos electrónicos, mensajería instantánea, etc.) vayan cifrados.

En el caso del cifrado de comunicaciones, el algoritmo de cifrado utilizado suelen ser algoritmos asimétricos como RSA o DSA, utilizados por protocolos de comunicación como PGP, GPG,SSL o TLS.


Cifrado asimétrico

Es importante conocer las bases del cifrado asimétrico de una comunicación de cualquier tipo. En una infraestructura de clave pública, cada actor (ya sea un servidor web, un cliente de correo, un navegador web, etc) tiene una clave pública (que todo el mundo puede conocer) y una clave privada (que sólo el propio actor debe conocer). Estas claves tienen la característica de que un mensaje cifrado con una de esas claves (ya sea la publica o la privada) puede ser descifrado por la otra. Es decir, si ciframos un mensaje con nuestra clave privada sólo podremos descifrarlo con nuestra clave pública. Y viceversa. Por eso se llama cifrado asimétrico.

Para garantizar la autenticidad, la confidencialidad y el no repudio en el envío de un mensaje (o un texto, o una imagen o lo que sea), el mensaje será cifrado primero con la clave privada del emisor y a continuación con la clave pública del receptor. Es decir, se cifrará dos veces. El receptor (el legitimo receptor) podrá descifrar el mensaje primero descifrando con su clave privada y luego con la clave pública del emisor.

Si un usuario es capaz de interceptar el mensaje (por ejemplo cuando pasa por el servidor de Holanda) nunca podrá descifrarlo. La razón es que, aunque pueda descifrar usando la clave publica del emisor, aún necesitará descifrar el mensaje resultante con la clave privada del receptor legítimo, que, por supuesto, no conoce.

Infraestructura de clave pública

Cuando nosotros compramos en una tienda a través de internet realmente no conocemos a quien le estamos comprando. ¿Quién nos dice que al otro lado no esta un delincuente que simplemente se quedará con nuestro dinero a cambio de nada?. Para esto existe una infraestructura de autoridades de certificación, autoridades de registro, certificados, etc. Una certificado es un ficherito que dice quien es el dueño de esa web, el algoritmo de cifrado preferido para sus comunicaciones, la clave pública de la web y el periodo de validez del certificado (entre otras muchas cosas).

Por ejemplo aqui podemos ver una conexión segura (en la que aparece el candadito) y al clicar sobre él nos da información sobre la comunicación web:

Como vemos el certificado nos indica que Microsoft.com esta en Redmond, Washington, US, que la conexion utiliza el protocolos TLS 1.2 y que para el cifrado usa AES_256_CBC y que para la negociación ha utilizado una variante del algoritmo RSA (ECDHE_RSA). Es más nos permite obtener más datos. Entre la información adicional se incluye la clave pública del servicio web (que es una RSA de 2048 bits) y en la parte inferior nos la muestra (dado que es pública la puede conocer cualquiera). En la sección de cifrado de comunicaciones web veremos que es cada una de estas cosas.

La entidad generadora de estos certificados es lo que se llama una autoridad de certificación (CA) y en certificados web los más conocidos son VeriSign o goDaddy. En el caso del ejemplo anterior se la CA es Symantec, la casa antivirus.

¿Y como sabe esa "autoridad" de certificación que realmente esa web pertenece a esa persona?. Lo cierto es que no lo sabe. Además, cualquier podría crearse un una "autoridad de certificación" y certificar que yo soy yo. Esto ultimo se soluciona porque los navegadores aceptan por defecto los certificados firmados por la autoridades de certificación bien conocidas, como VeriSign, Thawte, etc. Estos los podemos ver yendo a ajustes, opciones de internet --> contenido --> certificados --> Entidades de certificación Raiz de Confianza. Ahí veremos un listado de unas 200 CAs que acepta nuestro navegador (en este caso Internet Explorer). El 99% de los certificados web están firmadas por 4 o 5 entidades de certificación.

En este ejemplo, la autoridad de certificación no esta aceptada por el navegador. La CA resulta ser la administración española (es la página de la sede electrónica del MEC) pero como el navegador es de origen americano y se pretende que sea de uso universal, no incluyen a la administración española como CA. Esta es la razón por la que cada vez que tenemos que realizar trámites con la administración, nos pide que instalemos los certificados que la avalan.

Pues bien a todo este conglomerado de entidades de certificación, de registro, certificados, listas de revocación de certificados, etc. es a lo que se llama Infraestructura de clave pública.


Cifrando comunicaciones web

Cuando hacemos una compra a través de internet estamos enviando cierta información confidencial como los dígitos de la tarjeta de crédito, el usuario, la fecha de caducidad y el código CCV de la tarjeta. Con esta información, cualquier podría realizar una compra a través de internet, suplantando nuestra identidad, por lo que sólo debe ser conocida por el usuario y la tienda.

Sin embargo esa comunicación esta pasando por los servidores de su ISP, servidores comunicaciones alojados (generalmente) en EEUU, probablemente otros servidores alojados en Inglaterra u Holanda, los servidores del hosting de la tienda donde esta alojada la página web donde estamos comprando. Es una largo camino y un montón de servidores de los cuales no sabemos nada ni si han sido comprometidos o que sistemas de seguridad disponen.


Camino que siguen una consulta a twitter desde algún lugar de Francia

Por esta razón es necesario proteger la comunicación de manera que viaje cifrada desde nuestro ordenador al servidor web de la tienda. Para conseguir esta comunicación cifrada, el primer requisito es que el servidor web este configurado para admitir conexiones HTTPS.

Una conexión segura contra un servidor web que admitan conexiones HTTPS tiene 3 fases. En una primera fase el navegador web y el servidor negocian el algoritmo de cifrado de la comunicación. Este proceso se llama Handshake y sirve para que se establezcan varios parámetros que permitan realizar la conexión de una forma segura.Una vez terminada la negociación, la conexión segura es establecida. En ese momento, el servidor web le envía su certificado, que almacena el nombre de la entidad certificadora (CA) del servidor web, el periodo de validez de ese certificado y la clave pública del servicio web. Tal y como vimos antes, si el navegador detecta que o bien el periodo de validez es invalido y la CA son inválidos, nos mostrará un mensaje de error indicándolo, pero nos dejará continuar bajo nuestra responsabilidad.

A continuación el navegador generará una clave maestra de cifrado y se la enviará al servidor web usando la clave pública de éste, y a partir de este momento la comunicación irá cifrada usando la clave maestra (que solo el servidor y el navegador conocen puesto que el intercambio se ha producido de forma cifrada). Realmente el resto del intercambio se realiza utilizando un cifrado simétrico (cifrado y descifrado con la misma clave) que ha sido negociado en la primera fase de la conexión. El cifrado asimétrico se usa únicamente para la fase de negociación entre el navegador y el servidor.

lunes, 16 de mayo de 2016

Cifrado (I)

Comienzo una serie de tres articulos sobre el cifrado que me pidieron para una publicación y de la cula al final cogieron solo una pequeña parte. Como el texto es largo, lo dividiré en tres posts. Tratan del cifrado de discos, del cifrado de moviles y del cifrado de correos electrónicos. Esta serie de artículos fueron publicados por Realsec para su blog de ciberseguridad.

INTRODUCCIÓN

En un mundo global como el que estamos todo acaba globalizándose, incluidas las amenazas que pueden afectar a una empresa. También los atacantes que ejecutan esas amenazas se globalizan, hasta los métodos de defensa están comenzando a globalizarse. Cualquiera puede hoy en día jugar a ser hacker. Un par de cursillos, un par de foros underground, unas cuantas descargas y, a falta de conocimiento especializado, cualquiera puede convertirse en una importante amenaza importante para una empresa, sea del tamaño que sea.

Desde el mundo empresarial hay que ponerse las pilas en securizar los sistemas y las comunicaciones para evitar que cualquiera pueda acceder a información confidencial o comprometida.

Aparte de esforzarnos en evitar que "los malos" accedan a nuestros sistemas, un segundo nivel de protección consistiría en evitar que, si consiguen acceder, puedan leer ningún dato confidencial. Para ello lo ideal es el cifrado tanto de los sistemas de la empresa como de las comunicaciones que realizamos a diario con clientes, colaboradores, proveedores y conocidos en general.

Cifrado

El cifrado de información consiste en la aplicación (previa introducción de una clave de cifrado) de un algoritmo a un texto, imagen o cualquier otro tipo de documento, de manera que el "objeto" obtenido sea completamente ilegible, pero que, a la vez, sea posible descifrarlo aplicando la misma contraseña u otra asociada, obteniendo al final el documento original.

Según como sea esta clave de cifrado, existen dos tipos de algoritmos de cifrado. Por una parte el cifrado simétrico y por otra el cifrado asimétrico. A grandes rasgos, en el cifrado simétrico, también conocido como cifrado de clave secreta, se utiliza la misma clave para cifrar y descifrar la información, mientras que en el cifrado asimétrico, o cifrado de clave pública, se utiliza un par de claves diferentes (pero relacionadas entre ellas) para el cifrado y descifrado de la información.

Podemos decir que el cifrado asimétrico es una especie de cifrado dirigido entre dos personas y por tanto es habitual encontrarlo en el cifrado de comunicaciones. El cifrado asimétrico además garantiza, aparte de la confidencialidad, la integridad del texto (que no haya sido modificado por quien no debe) y el no repudio (que el autor no pueda retractarse de lo que ha escrito).

Pero, ¿qué herramientas hay disponibles para poder cifrar nuestra información? Existen en el mercado infinidad de productos comerciales para el cifrado de información, pero no es necesario gastarse dinero para conseguir un buen producto. Prácticamente todos los sistemas operativos incluyen de forma nativa herramientas que nos permite cifrar los datos almacenados en las unidades de disco, memorias USB y demás dispositivos conectados. Estas herramientas nos permiten cifrar toda la unidad o archivos previamente seleccionados.

La mayoría de estas herramientas de cifrado utilizan el algoritmo AES. Se trata de un algoritmo de cifrado simétrico, adecuado para los más altos niveles de confidencialidad, aunque también existen otros tipos de cifrado, como las diferentes variantes de DES (DES, 3DES, DESX ...) o RSA.

EFS

En todas las versiones de los sistemas operativos Windows (desde Windows 2000) existe EFS, que permite el cifrado de ficheros o directorios de forma sencilla. Simplemente clicando con el botón derecho sobre un directorio en Windows, seleccionando la opción "Propiedades" y dándole al botón "Opciones avanzadas" nos aparece el cuadro de dialogo que vemos en la imagen y que nos permite cifrar el directorio de una forma sencilla.

Sin embargo no hemos introducido ninguna clave para el cifrado. ¿Cómo es posible que hayamos cifrado el fichero?. Esto es porque EFS automáticamente ha generado una clave de cifrado aleatoria y única para este directorio o fichero. El algoritmo de cifrado utilizado ha sido AES, antes mencionado, con un tamaño de clave de 256 bits (. Dado que se trata de un cifrado simétrico, la clave será la misma para descifrar el fichero. Y dado que esa clave sólo la conoce EFS, ésta debe estar almacenada en algún sitio. Pues bien, este sitio es en el propio fichero que acabamos de cifrar. Es un poco enrevesado, me explico: La clave de cifrado, también es un texto y también se puede cifrar. Lo que hace EFS es cifrar la clave de cifrado con un algoritmo diferente, en este caso RSA y utilizando como clave nuestra contraseña de acceso a Windows. El texto resultante lo "pega" al final del fichero que habíamos cifrado antes y lo almacena en disco. De esta manera, este directorio o fichero solo podrá ser descifrado por el usuario que sepa la clave de acceso a Windows, que se supone que somos sólo nosotros.

Desde el explorador de Windows no podemos hacer mucho mas con EFS, sin embargo, con todos los sistemas Windows viene una herramienta de línea de comandos llamada cipher.exe que permite cifrar y descifrar ficheros utilizando la clave tanto simétrica como asimétrica que nosotros deseemos.

EFS tiene sin embargo algunas deficiencias. Por ejemplo no encripta los ficheros propios del sistema operativo y aunque creamos que tenemos todo disco cifrado y nadie puede leer nuestra información, si se trata de un equipo portatil que no conectamos contra un servidor de dominio, un atacante podría obtener el hash de la cuenta de usuario y si ésta no es lo suficientemente compleja, obtener la contraseña de usuario, utilizada como hemos visto por EFS para cifrar los ficheros del disco duro.

BITLOCKER

Para evitar esto, a partir de Windows 7, aunque únicamente en las ediciones Ultimate y Enterprise, disponemos de una herramienta llamada Bitlocker, con una interfaz gráfica muy intuitiva, que nos permitirá cifrar de manera muy simple nuestra unidad completa (esta vez de verdad) o los archivos sueltos que queramos. En este caso el algoritmo de cifrado utilizado es AES con clave de 128 bits. En el caso de cifrado de unidades enteras, si el equipo esta apagado, el disco permanecerá cifrado, desde el primer hasta el último bit.

Para lanzar bitlocker lo mejor es buscar la aplicación Bitlocker Drive Encription:

En Windows 8/10 es igual:

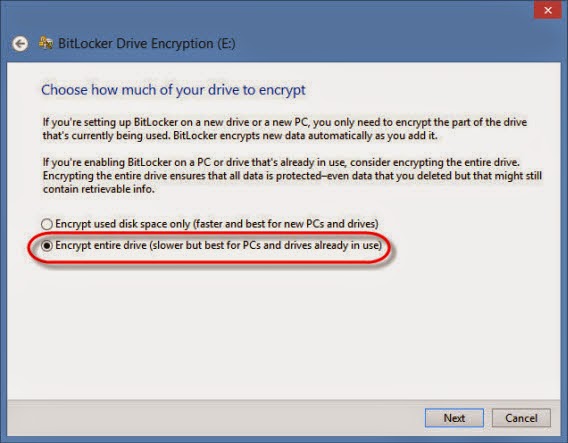
Como indicabamos Bitlocker permite cifrar una unidad entera o solo un conjunto de archivos:

Bitlocker nos da la opción de escribir una clave de cifrado que sólo nosotros sabremos o dejarle a él escoger una clave aleatoria. En este caso, como ocurría con EFS, esa clave (llamada FVEK) será cifrada con otra clave llamada VMK la cual será almacenada en una región especial del disco cifrado. Para aumentar la seguridad, bitlocker nos ofrece la opción de cifrar esta clave, la VMK y almacenar la clave en una unidad USB o bien utilizar un hardware especial que cumpla con el estándar TPM v1.2. De esta manera sólo sería posible arrancar el equipo si disponemos de esa llave USB o de ese hardware conectado.

En ambos casos es absolutamente necesario tener una vía de recuperación en caso de que olvidemos la clave o se pierda la llave USB. Por eso el siguiente paso al cifrar un unidad con bitlocker es obtener una clave de recuperación, ya sea en un USB, impresa o en una cuenta de Microsoft:

Una vez tengamos el disco cifrado con Bitlocker nosotros, como usuarios, no notaremos nada, puesto que todo lo que se escriba y lea del disco pasará a través de Bitlocker y será éste quien cifre y descifre todo de forma transparente para el usuario. Nosotros veremos los ficheros como los veíamos hasta ahora.

Los expertos en seguridad se quejan de que el algoritmo de cifrado utiliza bloques de solo 128 bits, lo que significa que, con un cierto esfuerzo, podría ser posible su descifrado utilizando técnicas de fuerza bruta.

Algunas alternativas a bitlocker son DiskCryptor, TrueCrypt (aunque descontinuado parece que nunca se encontró ningún backdoor) o Veracrypt, que es un fork de Truecrypt. Todas ellas soportan USB como clave, y al menos DiskCryptor soporta arranque desde partición boot externa.

Linux y OSX

En sistemas operativos Linux, disponemos en todas sus versiones de la herramienta de cifrado GnuPG. Para permiten usar llaves USB para el descifrado automático de unidades no existe una solución como tal pero se puede conseguir aprovechando herramientas como cryptsetup y usb_keymaster usando LUKS y dm-crypt. Por ultimo, en el sistema operativo de Apple (OSX) disponemos de la herramienta FileVault2, también disponible en todas sus versiones y que utiliza el algoritmos AES con claves de 256 bits.

Además de las herramientas integradas en los sistemas operativos, para cifrar archivos sueltos, disponemos de esta opción en las herramientas de compresión, que nos permiten cifrar el contenido de archivo comprimido utilizando una contraseña introducida por nosotros. También, existen aplicaciones de software libre específicas de cifrado que nos permitirán mantener nuestros datos seguros de manera gratuita.

jueves, 28 de abril de 2016

Developing a Bro analyzer as a plugin

Bro is an open source Unix based network monitoring framework that can be used mainly for collecting network measurements, and based on that conducting forensic investigations, traffic baselining, build a NIDSand many other tasks. It includes an event-driven programming language that allow to implement actions when an specific packet, message or event has happened.

The main building block of bro are the protocol analyzers and many protocol analyzer have been implemented and are included with the bro's core. However there are many other that are not implemented, and , in many cases, a company could be interested in implementing an analyzer for a proprietary protocol.

That was my task during the last month. My company had to implement a monitoring tool on a proprietary protocol and a plugin had to be developed to allow operators include this protocol into their bro installations.

This lack of information found has drive me to write this entry and to explain what I did , what problems I found how did manage to bypass them.

The main problems I have found in bro are the variety of different technologies necessary to develop an analyzer and the LACK of documentation. The last one is mainly the reason why I have written this post.

In my case I had a propietary protocol, that worked over TCP on port 302. The protocol message structure varies depending on the first byte (the function code) value. In this post I will only explain two different request messages, although the protocol had more than 20 different function codes:

Message 1

Function Code: 0x22
Message structure:
        CRC:                    32 bits;
        Value_Number:           8 bits;
        Var_Type_Code:          16 bits;
        u:                      16 bits; 
        u2:                     8 bits;
        Codified_Var_Numbers:   16 bits; 
        data:                   ;

Message 2

Function Code: 0x31
Message structure:
        id:                 16 bits;


Starting

As this was a proprietary protocol there was no other protocol I could base on. So I had to start the development from scratch. After reading the bro's documentation, mainly:

...I got buffled by the amount of technologies to use.

Mainly, I had to write an anlyzer, which pretty well explained in the documentation, and I had to write a plugin, which is also well explained... if it's a simple plugin, but if you want to put it all together, there's no guide to follow.

To write a simple analyzer the easies way is to follow the instructions in [3], running the start.py script. It will basically create the following files for you:

  • CMakeLists.txt
  • events.bif
  • Plugin.cc (if you use the -plugin option which you need to)
  • MyProt.pac
  • MyProt-protocol.pac
  • MyProt-analyzer.pac
  • MyProt.cc
  • MyProt.h

That's OK, but it does not explain how to modify them to develop your analyzer. And the other hand and VERY IMPORTANT, it does NOT include the configure and MakeFile files.

Secondly, we could follow the instructions given in [2] and using the init-plugin script, it would create the following files and directories:

  • configure
  • Makefile
  • src directory
  • src/Plugin.cc
  • src/Plugin.
  • MyProt_plugin.bif
  • scripts directory
  • tests directory

Good enough, it includes a configure and Makefile files BUT, there's no explanation on how to modify these files to create an analyzer.

What did I do?

Join together all the files created by both scripts.

These are the steps followed to get a working framework:

  1. Install bro with it's sources. The process is explained in "Installing bro". I would NOT have another bro installation in the box to avoid conflicts between them.
  2. Create a work directory. In my case it was created in /tools/bro/bro/MyProt_plugin, while bro was installed in /tools/bro/bro
  3. From this directory, run the start.py script with the -plugin option. Follow the instructions given in [3].
  4. Run the init-plugin script, which is in /aux/bro-aux/plugin-support/init-plugin. The arguments a gave where "MYPROT MYPROT"
  5. In my case I moved to the src directory the MyProt.cc and MyProt.h files generated by start.py. However this step is not necesary if later you do not modify some lines in other file.


The different technologies used

To continue with the explanation I will explain the different technologies involved in the analyzer development, which are C++, BIF, BinPAC and Bro.

At the end of the day, the analyzer must be compiled with a C++ compiler and built with Make. But to create these .cc and .h files, the bro guys use binpac and later use BIF. Finally to use the events generated using this analyzer, bro scripts must be written.

  • BinPac is a yacc parser that can be used to develop application protocol parsers. Its syntax is based on types and subtypes and I recommend to read the documents [4] and [6] to understand how to works. What BinPAC does is mainly, generate a .cc and .h files that when compiled and run, will be able to understand the protocol given.

  • BIF is an acronym of BuiltIn Functions and is a new layer that allows to interact the C/C++ event engine with the PAC Files. It has its own syntax and for an anlyzaer, it's used in the analyzer.pac file and the events.bif and types.bif files

  • The BRO scripting language allow us to take advantage of the bro framework and event infrastructure to write bro policies.

  • Finally BRO framework is written in C/C++ and while writing an analyzer there are parts that have to be written directly in C/C++.

  • One of the initial scripts is written in Python. This script (start.py) allow us to create the structure of C/C++ files for developing an anlyzer

  • The other script (init-plugin) is written in Bash Shell and will create the file structure for developing a plugin. Other Shell script was eventually written to automate the compilation process.


The files

The start.py script generated (among many other) two important files: MyProt.cc and MyProt.h. These are the starting point of an analyzer and its structure it always the same:

#include "MyProt.h"
#include "analyzer/protocol/tcp/TCP_Reassembler.h"
#include "events.bif.h"

using namespace analyzer::myprot;

MyProtTCP_Analyzer::MyProtTCP_Analyzer(Connection* c): TCP_ApplicationAnalyzer("MYPROT1234", c)
  {
   interp = new binpac::MyProtTCP::MyProtTCP_Conn(this);
  }

MyProtTCP_Analyzer::~MyProtTCP_Analyzer()
  {
   delete interp;
  }

void MyProtTCP_Analyzer::Done()
 {
         TCP_ApplicationAnalyzer::Done();
   interp->FlowEOF(true);
  interp->FlowEOF(false);
 }

void MyProtTCP_Analyzer::DeliverStream(int len, const u_char* data, bool orig)
 {
  TCP_ApplicationAnalyzer::DeliverStream(len, data, orig);
  interp->NewData(orig, data, data + len);
 }

void MyProtTCP_Analyzer::Undelivered(uint64 seq, int len, bool orig)
 {
  TCP_ApplicationAnalyzer::Undelivered(seq, len, orig);
  interp->NewGap(orig, len);
 }

void MyProtTCP_Analyzer::EndpointEOF(bool is_orig)
 {
  TCP_ApplicationAnalyzer::EndpointEOF(is_orig);
  interp->FlowEOF(is_orig);
 }

This file is the joining point between bro and the new Analyzer. With this code, the analyzer can be registered in bro, Connections will be created and allow the messages to be delivered to the Analyzer.

On the other hand we find the Plugin.cc and Plugin.h files which allow bro to create a plugin:

    #include "Plugin.h"

    namespace plugin {
    namespace MYPROT_MYPROT {

    Plugin plugin; } }

    using namespace plugin::MYPROT_MYPROT;

    plugin::Configuration Plugin::Configure()                                                         
        {
        plugin::Configuration config;
        config.name = "MYPROT::MYPROT";
        config.description = "MY protocol";
        config.version.major = 0;
        config.version.minor = 1;
        return config;
        }

It's a simple code that allow adding BIF functions into bif files and implementing them as a plugin. But this is not our case. We want an analyzer as a plugin. To get it we'll have to add the following to lines to this file. An include file will be added to the top of the file:

    #include "MyProt.h"

...and we'll add an analyzer component to the Plugin with the following line INSIDE the configure method:

AddComponent(new ::analyzer::Component("MYPROT1234", ::analyzer::myprot::MyProtTCP_Analyzer::Instantiate));

The "MYPROT1234" text is the Tag that allows bro to recognize the analyzer. It's also defined in the analyzer definiticion in MyProt.cc (see above).

For a Bro analyzer three different PAC files are generally used (MyProt.pac, MyProt-protocol.pac and MyProt-analyzer.pac). However this is not really necessary and everything could go in a single PAC File, but to make things easier I will explain it splitted in three files.

The main one (MyProt.pac) is always very similar (take a look at the comments added by me). It allows to declare what a Connection is, what a PDU is and call the other two PAC Files. This is MyProt.pac:

#
#THESE TWO FILES NEED TO BE COPIED FROM THE BRO SOURCE DIRECTORY TO OUR WORKING DIRECTORY TO MAKE IT WORK:
#
%include binpac.pac
%include bro.pac

###
#THESE LINES ARE NECESSARY BECAUSE LATER A events.bif.h file IS GENERATED, BUT IT'S NOT INCLUDED 
#ANYWHERE. WE MAKE THE INCLUDE HERE THAT WILL BE ADDED LATER IN THE .cc FILE
###
%extern{
#include "events.bif.h"
%}

###
#HERE WE DECLARE THE ANALYZER. IT IS ALWAYS MORE OR LESS THE SAME, IT HAS A CONNECTION AND TWO 
#FLOWS. OFICCIALLY A FLOW IS A SEQUENCE OF MESSAGES AND THE STATE BETWEEN MESSAGES
###
analyzer MyProtTCP withcontext {
 connection: MyProtTCP_Conn;
 flow:       MyProtTCP_Flow;
};

##
#...AND A CONNECTION IS AN UPLOAD FLOW AND A DOWNLOAD FLOW 
##
connection MyProtTCP_Conn(bro_analyzer: BroAnalyzer) {
 upflow = MyProtTCP_Flow(true);
 downflow = MyProtTCP_Flow(false);
};

##
#AS WE CAN SEE; AFTER DECLARING WHAT A CONNECTION AND A FLOW IS WE INCLUDE THE MYPROT-PROTOCOL.PAC 
#AND THE PROCESSING CONTINUES WITH IT
##
%include MyProt-protocol.pac

##
#A FLOW COMPONENTS ARE PDUs. IN MyProt-protocol.pac WE HAVE PREVIOUSLY DEFINED WHAT A MyProt PDU IS.
##
flow MyProtTCP_Flow(is_orig: bool) {
 flowunit = MyProtTCP_PDU(is_orig) withcontext (connection, this);
}

##
#FINALLY THE ANALYZER IS INCLUDED TO GENERATE THE EVENTS
##
%include MyProt-analyzer.pac

#
#MAINLY SPEAKING, IN THE PROTOCOL.PAC FILE WE EXPLAIN THE PROTOCOL AND IN THE ANALYZER-FILE.pac 
#WE WRITE THE FUNCTIONS TO UNDERSTAND THE PROTOCOL


OK, now we'll go through the MyProt-protocol.pac file (Again read the comments written by me). This file allow to define how is structure of the different messages of the protocol:

#HERE WE DEFINE WHAT IS A PDU FOR THIS PROTOCOL. AS WE SAW PREVIOUSLY, IT'S COMPOSED BY A ONE 
#BYTE HEADER AND A BODY
##
type MyProtTCP_PDU(is_orig: bool) = record {
 header: uint8;
 body: case is_orig of {
  true  -> request:  MyProtTCP_Request(header);   
  false -> response: MyProtTCP_Response(header);
 };
} &let {
 deliver: bool = $context.flow.deliver_MyProtTCP_PDU_FUNCTION(this)
};

##
#AS WE CAN SEE IN THE LET SECTION, WHEN RECEIVED, THE FUNCTION MyProtTCP_PDU_FUNCTION(MyProtTCP_PDU *f) 
#IS CALLED. THIS FUNCTION IS IMPLEMENTED IN THE MyProt-analyzer.pac FILE
##

##
#THE MyProtTCP_Request and Resopnse TYPES ARE DECLARED NEXT. AS WE CAN SEE THE FUNCTION CODES HAVE 
#SUBFUNCTION CODES NEXT AND IN THE RESPONSE PDUs THERE IS A RESPONSE STATUS VALUE 
##
type MyProtTCP_Request(header: uint8) = record {
       ufc:            uint16;
       body:           MyProt_Request(header, ufc);
} &let {
       deliver: bool = $context.flow.deliver_UniRequest(header, this);
} &byteorder=littleendian;


type MyProtTCP_Response(header: uint8) = record {
       urs:   uint16;
       body:       MyProt_Response(header, urs);
} &let {
       deliver: bool = $context.flow.deliver_UniResponse(header, this);
} &byteorder=littleendian;

##
#WHEN A REQUEST OR RESPONSE MESSAGE IS DETECTED, THE FUNCTION UNIREQUEST AND UNIRESPONSE ARE 
#CALLED. THESE FUNCTIONS ARE IMPLEMENTED IN THE ANALYZER.PAC FILE.
#
#THE MYPROT_REQUEST AND RESPONSE TYPES ARE DEFINED NEXT
##
type MyProt_Request(TCPheader: uint8, Uheader: uint16) = case Uheader of {
        0x22                -> readSystemVar:           readSystemVarRequest(TCPheader, Uheader);
        0x31                -> readId:              ReadIdRequest(TCPheader, Uheader);

(...)
};

type MyProt_Response(TCPheader: uint8, Uheader: uint16) = case Uheader of {
        0xFE                -> ok:            Response_OK(TCPheader, Uheader);
        0xFD    -> error:  Response_Error(TCPheader, Uheader); 
};

##
#IN THEM WE DEFINE THE DIFFERENT VALUES OF THE FUNCTION CODES AND WHAT FUNCTION WILL TREAT THEM. 
#IN THIS CASE WE WILL ONLY EXPLAIN THE ReadSystemVar REQUEST AND THE READID REQUEST
##

type ReadSystemVarRequest (TCPheader: uint8, Uheader: uint16) = record {
    data:       BinPAC_MyProt_ReadWriteSystemVarsRequest_Format;
} &let {
 deliver: bool = $context.flow.deliver_ReadSystemVarRequest(TCPheader, Uheader,this);
} &byteorder=littleendian;


type ReadIdRequest(TCPheader: uint8, Uheader: uint16) = record {
   Id: uint16;
} &let {
 deliver: bool = $context.flow.deliver_ReadIdRequest(TCPheader, Uheader,this);
} &byteorder=bigendian;

##
#FINALLY WE NEED TO DECLARE THE TYPE BinPAC_MyProt_ReadWriteSystemVarsRequest_Format THAT WE 
#USED IN THE ReadSystemVarRequest TYPE.
##
type BinPAC_MyProt_ReadWriteSystemVarsRequest_Format = record {
        CRC:            bytestring &length=4;
 Value_Number: uint8; 
 Var_Type_Code: uint16;
 u:   uint16;
 u2:   uint8; 
 Var_Numbers: uint16; 
 data:  bytestring &restofdata;
} &byteorder=littleendian;

##
#AS WE CAN SEE THIS IS THE STRUCTURE OF THE MESSAGE 1. WITH MESSAGE 2 WE DO NOT NEED A RECORD 
#BECAUSE IT ONLY HAS ONE VALUE, THE ID, WITH 16 BITS

And that's all, we have defined a simple protocol.


MyProt-Analyzer.pac

Now we need to implement the protocol and implement the events that bro will be generating when a a protocol message is detected. This will be don in the MyProt-Analyzer.pac file:

#THE ANALYZER.PAC FILE HAS THREE DIFFERENT SECTIONS. THE FIRST ONE IS A DECLARATION OF THE FUNCTIONS 
#IMPLEMENTED IN IT. IT STARTS WITH THE SYNTAX %header{ AND THE FUNCTIONS DECLARED ARE DEVELOPED IN 
#THE FORMER SECTION %code{ ... }. FINALLY IN THE %Init{ ... } SECTION WE WILL IMPLEMENT 
#THE "Deliver_*" FUNCTIONS MENTIONED IN THE PROTOCOL.PAC FILE. THESE THREE SECTIONS ARE ACTUALLY BIF CODE
#
#
#ALTHOUGH THE %Header and %Code SECTION MUST BE INCLUDED BEFORE THE %Init SECTION, I WILL EXPLAIN 
#THE %Init EARLIER AND THEN THE OTHER TWO:
##
%Header{
...
%}

%Code{
...
%}

%Init{

(...)
       function deliver_ReadIdRequest(TCPheader: uint8, Uheader: uint16, 
                message: const_bytestring): bool
               %{

               if ( ::myprot_readid_request )
                       {
                       BifEvent::generate_myprot_readid_request(connection()->bro_analyzer(),
                                    connection()->bro_analyzer()->Conn(),
                                    TCPheader
                                    , Uheader
                                    , bytestring_to_val(message)
                                    );
                       }

               return true;
                %}

##
#THERE ARE MANY THINGS TO EXPLAIN HERE: 
#
#::myprot_readid_request IS A GLOBAL HANDLER WHICH EXISTS ONLY IF A MESSAGE OF THIS TYPE 
#HAS BEEN DETECTED. ITS NAME IS THE SAME AS #THE generate_myprot_readid_request FUNCTION 
#(WITHOUT THE generate_ PART) AND THE SAME AS THE NAME OF THE EVENT DEFINED IN THE events.bif FILE.
#
#THE BifEvent::generate_myprot_readid_request IS A BIF FUNCTION THAT WILL GENERATE THE CODE THAT 
#WILL MANAGE THE EVENT CREATION WHEN THIS MESSAGE IS DETECTED. THE EVENT NAME WILL BE (IN THIS 
#CASE) myprot_readid_request. THIS SAME NAME WILL HAVE TO APPEAR IN THE events.bif FILE.
#
#THIS METHOD DECLARATION, IN THE EVENTS.BIF FILE, WILL HAVE ONLY 4 PARAMETERS (ALL EXCEPT THE 
#FIRST 'ANALYZER' ONE).
#
#IF IN THIS "deliver" FUNCTION WE NEED TO USE AN AUXILIARY FUNCTION, IT WILL HAVE TO DECLARED 
#IN THE %header SECTION AND IMPLEMENTED IN THE %code SECTION
#
#BIF HAS ITS OWN TYPES AND ANY INT8, INT16, INT32, FLOAT, DOUBLE CAN BE CONVERTED INTO ITS 
#TYPE "COUNT", WHICH IS A 64bit VALUE
##

function deliver_ReadSystemVarRequest(TCPheader: uint8, Uheader: uint16, 
         message: ReadSystemVarRequest(TCPheader, Uheader)): bool
               %{

               if ( ::MyProt_readsystemvar_request )
                       {
                       BifEvent::generate_MyProt_readsystemvar_request(connection()->bro_analyzer(),
                                   connection()->bro_analyzer()->Conn(),
                                   TCPheader
                                   , Uheader
                                   , MyProt_ReadWriteSystemVarsRequestFormat_ToBro(message->data())
                                   );
                       }

               return true;
                %}

##
#MANY THINGS TO MENTION HERE AS WELL:
#
#AS WE CAN SEE, IN THIS CASE THE THIRD PARAMETER OF THE "Deliver" FUNCTION IF A RECORD OF 
#TYPE ReadSystemVarRequest, DEFINED IN THE PROTOCOL.PAC FILE. AS WE CAN ALSO SEE, THIS RECORD 
#HAS ONLY TWO PARAMETERS WHILE IN ITS DECLARATION HAS THREE PARAMETERS... THE LAST ONE DISAPPEAR.
#
#IN THE CALL TO THE "Generate" FUNCTION, THE LAST PARAMETER USES SOMETHING 
#CALLED MyProt_ReadWriteSystemVarsRequestFormat_ToBro. THIS IS AN AUXILIARY FUNCTION, 
#IMPLEMENTED BY US IN THE %CODE SECTION
##

%Header{
          RecordVal* MyProt_ReadWriteSystemVarsRequestFormat_ToBro(BinPAC_MyProt_ReadWriteSystemVarsRequest_Format *rec);
%}

%Code{
          RecordVal* MyProt_ReadWriteSystemVarsRequestFormat_ToBro(BinPAC_MyProt_ReadWriteSystemVarsRequest_Format *rec)
                {
                RecordVal* myprot_format = new RecordVal(BifType::Record::MyProtReadWriteSystemVarsRequestFormat);
                myprot_format->Assign(0, bytestring_to_val(rec->shifted_CRC()));
                myprot_format->Assign(1, new Val(rec->Value_Number(), TYPE_COUNT));
                myprot_format->Assign(2, new Val(rec->Var_Type_Code(), TYPE_COUNT));
                myprot_format->Assign(3, new Val(rec->u(), TYPE_COUNT));
                myprot_format->Assign(4, new Val(rec->u2(), TYPE_COUNT));
                myprot_format->Assign(5, new Val(rec->Var_Numbers(), TYPE_COUNT));
                myprot_format->Assign(6, bytestring_to_val(rec->data()));
                return myprot_format;
                }
%}

##
#MANY THINGS TO MENTION HERE TOO:
#
#NOTICE THE BifType::Record::MyProtReadWriteSystemVarsRequestFormat TYPE. THIS IS A RECORD TYPE FOR 
#THE BIF AND BRO FRAMEWORKS. IT MUST BE DEFINED IN THREE DIFFERENT PLACES:
#             - src/types.bif
#             - /build/scripts/base/init-bare.bro
#             - /build/src/types.bif.netvar_h
#
#NOTICE THE "TYPE_COUNT" TYPES. THEY ARE DEFINED IN Val.h IN BRO. A COUNT TYPE IS A 64bit INTEGER.
#
#NOTICE THE bytestring_to_val(rec->data()) FUNCTIONS. THIS IS AN INTERNAL BRO/BIF FUNCTION THAT 
#ALLOW TO CONVERT A bytestream INTO A StringVal TYPE. IT'S NECESSARY WHEN SENDING STRINGS AS PARAMETERS

The events.bif file store the declaration of the different events the analyzer will be capturing. Its structure is the following:

(...)
event MyProt_readid_request%(c: connection, TCPheaders: MyProtTCPHeaders, 
            Uheader: URequestHeader, Data: string%);

event MyProt_writesystemvar_request%(c: connection, TCPheaders: UTCPHeaders, 
            Uheader: URequestHeader, UReadWriteSystemVarBody: MyProtReadWriteSystemVarsRequestFormat%);
(...)

These events will be re-written in our bro script files.

On the other hand if we are declaring new bro record, we need to define them in the types.bif file:

(...)
type MyProtRequestHeader: record;
type MyProtResponseHeader: record;

type MyProtReadWriteSystemVarsRequestFormat: record;
(...)

They will be specified in the init-bare.bro file:

(...)
type MyProtReadWriteSystemVarsRequestFormat: record {
        CRC:            string;
        Value_Number:   count;
        Var_Type_Code:  count;
        u               count;
        u2:             count;
        Vars_Numbers:   count;
        data:           count;
};
(...)

Finally to avoid error during compilation, for every new record it's necessary to include the following line in the /build/src/types.bif.netvar_h file:

(...)
    namespace BifType { namespace Record{  extern RecordType * MyProtReadWriteSystemVarsRequestFormat;  } } 
(...)

Compilation process

So, we have developed the BinPAC Parser. Everything's going to be easier now.... Stay quiet man, stay quiet. Things get worse now...

To "compile" this PAC files we'll use binpac:

binpac MyProt.pac

If there's no error, two new files will be generated:

  • MyProt_pac.cc
  • MyProt_pac.h

So, now we have three .cc files (Plugin.cc, MyProt.cc and MyProt_pac.cc) and three .h files (Plugin.h, MyProt.h and MyProt_pac.h). How the hell do we handle this??

Well, we need to include the MyProt_pac.h file in the MyProt.h file:

#include "myprot_pac.h"

Then we need to modify the CMakeFiles.txt to add all four files, together with the .bif files. So the CMakeFiles.txt will have to look like:


cmake_minimum_required(VERSION 2.8)

project(Plugin)

include(BroPlugin)

bro_plugin_begin(MYPROT MYPROT)
bro_plugin_bif(src/types.bif src/events.bif)
bro_plugin_cc(src/Plugin.cc src/MyProt.cc src/MyProt_pac.cc)
bro_plugin_dist_files(README CHANGES COPYING VERSION)
bro_plugin_end()

So, to resume, the steps that must be followed to make all this work are:

  1. Prepare .pac files
  2. launch the command: binpac Myprot.pac
  3. If everything went OK, all MyProt.h, MyProt.cc, MyProt_pac.h, MyProt_pac.cc will have to be moved to the src directory (not actually necessary)
  4. Modify Plugin.cc as mentioned earlier
  5. If new records are used, the types.bif will has to be updated
  6. If new events are defined, the events.bif has to be updated
  7. Now we need to remove the build directory and run the compiling commands:
rm -rf build/
binpac myprot.pac 
mv myprot_pac.* src
./configure --bro-dist=..
make
make install


After building the analyzer

To test if bro is detecting the plugin we'll run:

bro -NN | grep -i myprot

Now we need to register the analyzer in the MyBroScript.bro script:

(...)
const ports = { 302/tcp };
(...)
event bro-init()
{
(...)
          Analyzer::register_for_ports(Analyzer::ANALYZER_MYPROT, ports);
(...)
event myprot_readid_request(c: connection, TCPheaders: MyProtTCPHeaders, MyProtheader: MyProtRequestHeader, Data: string)
{
      print("MyProt Read Id request Message detected");
}

event myprot_writesystemvar_request(c: connection, TCPheaders: MyProtTCPHeaders, MyProtheader: MyProtRequestHeader, 
              MyProtReadWriteSystemVarBody:MyProtReadWriteSystemVarsRequestFormat)
{ 
       print("MyProt 0x23 Message detected"); 
}


The hard part

My protocol has a request/response architectutrte, and the request/response message structure depends on a Function Code. This Function Code is sent in the request message, but NOT in the response message.

So, when I receive a response I don't know if it belongs to the request A or the request B. The only way to know that is checking the transport level ID.

So, I need to maintain any kind of array that relate transport id values and function codes. The question is how to do that. I need to read and write that global value in the MyProt-protocol.pac file.

The solution came by modifying the connection class and adding the array (in the MyProt.pac file):

(...)
refine connection UmasTCP_Conn += {
        %member{
                int previous_fcs[256];
        %}
};
(...)

Then added a RESPONSE type that call to a function to recover the FC data from the array:

(...)

type XXX{
(...)
} &let {
       (...)
       ufc: uint8 = $context.connection.get_Previous_FC(header.Transport_id);
};
(...)

And wrote two functions in the analyzer.pac file:

(...)
refine connection MyProtTCP_Conn += {
        (...)

        function get_Previous_FC(Transport_id: int): int
        %{
                return previous_fcs[tid%256];
        %}

        function SetTID_FC(transport_id:int, ufc:int): bool
        %{
                previous_fcs[transport_id%256]=ufc;

                return true;
        %}
(...)

The second one is called every time a message event is detected:

(...)
 function deliver_message(header: BinPAC_TCP_Header, MYPROTheader: BinPAC_MYPROT_header): bool
                %{
                if ( ::MyProt_message )
                   {
                           connection()->SetTID_FC(${header.transport_id}, ${MYPROTheader.myprot_fc});
(...)


Errors found

During compilation I found a wide variety of error, which very often I didn't know why they were happening. To avoid you the multiple hours spent looking for the root causes of these errors, I will explain the error message and the original cause of some of the errors found:

Error:

fatal error in /usr/local/bro/share/bro/base/init-bare.bro, line 1: cannot load plugin 
library /usr/local/bro/lib/bro/plugins/MYPROT_MYPROT_MYPROT//lib/MYPROT-MYPROT.linux-x86_64.so: 
/usr/local/bro/lib/bro/plugins/MYPROT_MYPROT//lib/MYPROT-MYPROT.linux-x86_64.so: undefined symbol:
_ZN7BifType6Record36MyProtReadWriteSystemVarsRequestFormatE

Explanation: This error appears after a successful compilation of the plugin, when running a bro script. In this case there is a Record that Bro is not able to find. The Plugin compiles fine BUT there is a declaration missing either in types.bif or in netvar_h. This could be caused as well for not including a types.bif file in the CMakelists.txt file


Error:

/tools/MyBro/bro/MyProt_plugin/src/myprot_pac.cc: In member function ‘bool binpac::MyProtTCP::MyProtTCP_Flow::deliver_ReadSystemVarRequest
(binpac::MyProtTCP::BinPAC_MyProtTCP_TransportHeader*, binpac::MyProtTCP::BinPAC_MyProt_Request_Header*, 
binpac::MyProtTCP::ReadSystemVarRequest*)’: /tools/MyBro/bro/myprot_plugin/src/myprot_pac.cc:4300:71: error: 
‘MyProt_ReadWriteSystemVarsRequestFormat_ToBro’ was not declared in this scope
          , MyProt_ReadWriteSystemVarsRequestFormat_ToBro(message->data())

Explanation: There was a declaration missing in the %header section of the MyProt-analyzer.pac file. A similar error could be caused because the type name used in myprot-protocol.pac and in myprot-analyzer.pac are different. Check that.


Error:

myprot.pac:40: syntax error, at end of file (yychar=0)

Explanation: This error appears when running binpac and it's caused by a missing "}" that closes any function or if the final "}" is missing.


Error:

/tools/MyBro/bro/myprot_plugin/src/myprot_pac.cc: In function ‘RecordVal* 
binpac::MyProtTCP::MyProt_ReadWriteSystemVarsRequestFormat_ToBro
  (binpac::MyProtTCP::BinPAC_MyProt_ReadWriteSystemVarsRequest_Format*)’:
/tools/MyBro/bro/MyProt_plugin/src/MyProt_pac.cc:4902:42: error: 
‘MyProtReadWriteSystemVarsRequestFormat’ is not a member of ‘BifType::Record’
   RecordVal* MyProt_format = new RecordVal(BifType::Record::MyProtReadWriteSystemVarsRequestFormat);

Explanation: In this case, there a line missing in the %bro%/build/src/types.bif.netvar_h file. This could be caused as well if the name of the record is NOT correct when using it in the myprot-analyzer.pac file.


Error:

/tools/MyBro/bro/myprot_plugin/src/myprot_pac.cc: In function ‘RecordVal* 
binpac::myprotTCP::myprot_SetOwnerRequestFormat_ToBro(binpac::myprotTCP::BinPAC_myprot_SetOwnerRequest_Format*)’:
/tools/MyBro/bro/myprot_plugin/src/myprot_pac.cc:4894:62: error: expected ‘;’ before ‘)’ token
   myprot_format->Assign(0, new Val(rec->unknown(), TYPE_COUNT)));

Explanation: As explained in the error, there is an extra ')' in the indicated line.


Error:

/tools/MyBro/bro/myprot_plugin/src/myprot_pac.cc: 
In member function ‘bool binpac::myprotTCP::myprotTCP_Flow::deliver_InitCommRequest
(binpac::myprotTCP::BinPAC_MyProtTCP_TransportHeader*, binpac::myprotTCP::BinPAC_myprot_Request_Header*, 
const const_bytestring&)’: /tools/MyBro/bro/myprot_plugin/src/myprot_pac.cc:3987:10: error: too many 
arguments to function ‘void BifEvent::generate_myprot_initcomm_request
(analyzer::Analyzer*, Connection*, Val*, Val*)’
          );
          ^

Explanation: In this case, the number of arguments of an event in its declaration in events.bif and in the "generate_myprot_XXX_request" call in the myprot-analyzer.pac file.


Error:

In file included from /tools/pruebas_bro/MyBro/bro/umas_plugin/src/Umas.h:5:0,
                 from /tools/pruebas_bro/MyBro/bro/umas_plugin/src/Plugin.cc:3:
/tools/pruebas_bro/MyBro/bro/umas_plugin/src/umas_pac.h:3:0: error: unterminated #ifndef
 #ifndef umas_pac_h
 ^

Explanation: In this case, you have to run binpac myprot.pac and check the error given:

root@kali:/tools/MyBro/bro/myprot_plugin# binpac myprot.pac 
switching to file ./binpac.pac
switching to file ./bro.pac
switching to file ./myprot-protocol.pac
switching to file ./myprot-analyzer.pac
./myprot-protocol.pac:427: error : `BinPAC_MyProt_ReadWriteRequest_Format' undeclared

Error:

/tools/MyBro/bro/myprot_plugin/src/myprot_pac.cc:4927:3: error: expected unqualified-id before ‘{’ token
   {
   ^

Explanation: There is an extra ';' in the %code section of the myprot-analyzer.pac. Of course you can always go to line 4927 of myprot_pac.cc file and look for an error.


Error:

error in /usr/local/bro/lib/bro/plugins/MYPROT_MYPROT/lib/bif/./events.bif.bro, line 85: identifier not defined: MyProtReadWriteRequestFormat
error in /usr/local/bro/lib/bro/plugins/MYPROT_MYPROT/lib/bif/./events.bif.bro, line 90: identifier not defined: MyProtReadWriteRequestFormat
internal error in /usr/local/bro/lib/bro/plugins/MYPROT_MYPROT/lib/bif/./events.bif.bro, line 156: internal type MyProtReadWriteRequestFormat missing
Aborted

Explanation: This error appear when running our bro script because there is no entry in the init-bare file for the Record indicated.


Error:

error in /usr/local/bro/lib/bro/plugins/MYPROT_MYPROT/lib/bif/./events.bif.bro, line 125 and ./test2.bro, line 201: incompatible 
types (event(c:connection; TCPheaders:count; Uheader:URequestHeader; function:count;) and event(c:connection; TCPheaders:count; 
Uheader:URequestHeader;))

Explanation: This is NOT an error in our analyzer but in the bro script. We are not writing correctly all parameters of an event call. As you can see, there is an argument left.


Error:

/tools/MyBro/bro/MyProt_plugin/src/MyProt_pac.h:10:2: error: expected initializer before ‘RecordVal’
CMakeFiles/UMAS-UMAS.linux-x86_64.dir/build.make:242: fallo en las instrucciones para el objetivo 'CMakeFiles/MYPROT-MYPROT.linux-x86_64.dir/src/Plugin.cc.o'

Explanation: In this case it's a CMake error (it is showed in spanish). It was caused by a '#' in the header section of the analyzer.pac file...


Error:

/tools/MyBro/bro/MyProt_plugin/src/Myprot_pac.h:2669:2: error: expected initializer before ‘RecordVal’
  RecordVal* MyProot_SetOwnerRequestFormat_ToBro(BinPAC_MyProt_SetOwnerRequest_Format *rec);

Explanation: There was a ';' left at theend of function declaration in the analyzer.pac file.


Error:

/tools/MyBro/bro/Myprot_plugin/src/MyProt_pac.cc: In member function ‘bool binpac::MyProtTCP::MyProtTCP_Flow::deliver_InitCommResponse(binpac::MyProtTCP::BinPAC_MyProtTCP_Header*, binpac::MyProtTCP::BinPAC_MyProt_Response_Header*, binpac::MyProtTCP::InitCommResponse*)’:

/tools/MyBro/bro/MyProt_plugin/src/MyProt_pac.cc:4268:10: error: too many arguments to function ‘void BifEvent::generate_myprot_initcomm_response(analyzer::Analyzer*, Connection*, Val*, Val*)’         );

Explanation: The declaration of an event in the events.bif an in the analyzer.pac file was different.


Error:

/tools/MyBro/bro/myprot_plugin/src/myprot_pac.cc:2698:96: error: no matching function for call to ‘binpac::MyProtTCP::MyProtTCP_Flow::deliver_ReadInfoResponse0(binpac::MyProtTCP::BinPAC_MyProtTCP_Header*, binpac::MyProtTCP::BinPAC_MyProt_Response_Header*, binpac::MyProtTCP::ReadInfoResponse0*)’
  deliver_ = t_context->flow()->deliver_ReadInfoResponse0(TCPheader(), MYPROTheader(), this);

Explanation: In this case the 'deliver' function used in the protocol.pac an in the analyzer.pac files were different..


Error:

/tools/MyBro/bro/myprot_plugin/src/myprot_pac.cc:1894:59: error: invalid use of non-static member function
           message->parameter_header()->Parameter_Type());

Explanation: The first problem here is that the issue is NOT in the line shown by the compiler. In my case I had the following record in my myprot-analyzer.pac:

                    BifEvent::generate_comm_request(connection()->bro_analyzer(), connection()->bro_analyzer()->Conn(), 
                                                                        TCPHeaderToBro(header), message->msg_type,
                                                                         message->parameter_header()->Parameter_Type());

...and the problem it's there, but it's not related with the last line! it comes with the msg_type variable, it need a parentheses at the end:

message->msg_type(),

...and that's all, working!


Of course there are many other error you will find while compiling but it's impossible to add them all here.

I hope this post will be helpful to anybody. This is what I learned during two week battling against bro and its friends!.

miércoles, 9 de diciembre de 2015

Evolution of the APTs: an infography

This is an infography about the evolution of the APT campaigns over the last 5-6 years. It's update until November 2015.

I think it's interesting to realize how APT campaigns are growing high. Complex and hard stop issue...